
In this tutorial you will learn about the JSF 2 composite interface tag.
JSF 2 composite interface
In this tutorial you will learn about the JSF 2 composite interface tag.
<composite:interface> tag of JSF 2 composite tag library lets define the interface for configuring the component. Within the <composite:interface> tag ( parent tag ) you can add the children tags to it according to the implementation requirements. Some of these children can be as follows :
- <composite:actionSource>
- <composite:attribute>
- <composite:valueHolder>
- <composite:editableValueHolder>
Attributes of <composite:interface> tag
However, attributes of <composite:interface> tags are optional but they can be used as per the requirements. These attributes are as follows :
- name : Value of this attribute can be the type of java.lang.String that specifies the name of the current composite component
- componentType : Value of this attribute can be the type of java.lang.String that specifies component-type of the UIComponent.
- displayName : Value of this attribute can be the type of java.lang.String that specifies the name to be displayed in a tool palette.
- preferred : Value of this attribute can be the type of java.lang.boolean (true/false) that specifies whether it is a "preferred" component of not.
- expert : Value of this attribute can be the type of java.lang.boolean (true/false) that specifies whether this component is only for the expert users or not.
- shortDescription : Value of this attribute can be the type of java.lang.String. This attribute can be used for describing the short description of the composite component that what's it aim ?
Example :
Before discussing the example you should be aware about what are the basic structure required for creating composite component. You can read about this from here. In this example we will create a simple composite component ( compositeInterface.xhtml ) where I have created a simple interface inside the <composite:interface> tag and defined the attributes using the <composite:attribute> tag as a child of <composite:interface> then implemented this interface inside the <composite:implementation> tag.
Directory Structure

compositeInterface.xhtml
<!DOCTYPE html PUBLIC "-//W3C//DTD XHTML 1.0 Transitional//EN"
"http://www.w3.org/TR/xhtml1/DTD/xhtml1-transitional.dtd">

<html xmlns="http://www.w3.org/1999/xhtml"
xmlns:h="http://java.sun.com/jsf/html"
xmlns:f="http://java.sun.com/jsf/core"
xmlns:composite="http://java.sun.com/jsf/composite"
>

<composite:interface>

<composite:attribute name="nameLbl" />
<composite:attribute name="nameVal" />

</composite:interface>

<composite:implementation>

<h:form>

<h:panelGrid columns="2" id="pg">

#{cc.attrs.nameLbl} :
<h:outputText id="name" value="#{cc.attrs.nameVal}" />

</h:panelGrid>

</h:form>

</composite:implementation>

</html>
input.xhtml
<!DOCTYPE html PUBLIC "-//W3C//DTD XHTML 1.0 Transitional//EN"
"http://www.w3.org/TR/xhtml1/DTD/xhtml1-transitional.dtd">

<html xmlns="http://www.w3.org/1999/xhtml"
xmlns:h="http://java.sun.com/jsf/html"
xmlns:d="http://java.sun.com/jsf/composite/dev/compositeComp"
>
<head>
<title>JSF 2 composite interface tag</title>
</head>
<h:body>

<h3>JSF 2 composite interface Tag Example</h3>

<d:compositeInterface
nameLbl="Welcome"
nameVal="To Devmanuals JSF composite component Tutorial" />
</h:body>
</html>
web.xml
<?xml version="1.0" encoding="UTF-8"?>
<web-app xmlns:xsi="http://www.w3.org/2001/XMLSchema-instance" xmlns="http://java.sun.com/xml/ns/javaee" xmlns:web="http://java.sun.com/xml/ns/javaee/web-app_2_5.xsd" xsi:schemaLocation="http://java.sun.com/xml/ns/javaee http://java.sun.com/xml/ns/javaee/web-app_3_0.xsd" id="WebApp_ID" version="3.0">
<display-name>jsfCompositeTest</display-name>
<welcome-file-list>
<welcome-file>input.xhtml</welcome-file>
</welcome-file-list>
<servlet>
<servlet-name>Faces Servlet</servlet-name>
<servlet-class>javax.faces.webapp.FacesServlet</servlet-class>
<load-on-startup>1</load-on-startup>
</servlet>
<servlet-mapping>
<servlet-name>Faces Servlet</servlet-name>
<url-pattern>/faces/*</url-pattern>
<url-pattern>*.jsf</url-pattern>
<url-pattern>*.xhtml</url-pattern>
</servlet-mapping>
<context-param>
<description>State saving method: 'client' or 'server' (=default). See JSF Specification 2.5.2</description>
<param-name>javax.faces.STATE_SAVING_METHOD</param-name>
<param-value>client</param-value>
</context-param>
<context-param>
<param-name>javax.servlet.jsp.jstl.fmt.localizationContext</param-name>
<param-value>resources.application</param-value>
</context-param>
<listener>
<listener-class>com.sun.faces.config.ConfigureListener</listener-class>
</listener>
<servlet-mapping>
<servlet-name>Faces Servlet</servlet-name>
<url-pattern>*.faces</url-pattern>
</servlet-mapping>
</web-app>
How To execute this example
To execute this example you can download a WAR file example form here and import this war file into your eclipse by File -> import -> web -> war file and simply execute this example by selecting the imported project as follows :- Select your project -> Right Click -> Run As -> Run On Server.
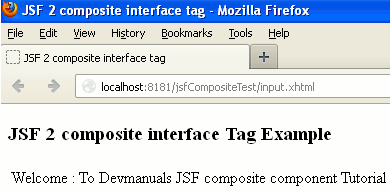
Output :
Once a project is successfully executed then the output will be as follows :
The HTML source code will be as follows :
<!DOCTYPE html PUBLIC "-//W3C//DTD XHTML 1.0 Transitional//EN" "http://www.w3.org/TR/xhtml1/DTD/xhtml1-transitional.dtd">
<html xmlns="http://www.w3.org/1999/xhtml">
<head>
<title>JSF 2 composite interface tag</title>
</head><body>

<h3>JSF 2 composite interface Tag Example</h3>
<form id="j_idt5:j_idt6" name="j_idt5:j_idt6" method="post" action="/jsfCompositeTest/input.xhtml" enctype="application/x-www-form-urlencoded">
<input type="hidden" name="j_idt5:j_idt6" value="j_idt5:j_idt6" />
<table id="j_idt5:j_idt6:pg">
<tbody>
<tr>
<td>
Welcome :
</td>
<td><span id="j_idt5:j_idt6:name">To Devmanuals JSF composite component Tutorial</span></td>
</tr>
</tbody>
</table>
<input type="hidden" name="javax.faces.ViewState" id="javax.faces.ViewState" value="H4sIAAAAAAAAAJWSz2sTQRTHXzdNa2OQGDUXiaciCLJBNKAEMaFt6GJaA1vB4kEnyTSZOLs7zrxNNj0UetGDF0E9iBU9ePDQm3+BeBAFBT16Eu8exasz+anQHByYx/D2/frs++7/hLhQEo62SYfYITJurxLVWiMiPv/t7bvM7S8xsMqQ4AFplEkdA+nAArYkVa2ANyJxpQjmJLuHtE3pG0OYa99iDcyHEo7drPTrcuI37Wu1Nq1j4eHnGy9S6gy3ACKhE+JCn/Au7EDMpO9IuGByInuL1Kmy64EnAp/6aF931onH/OZS4CNhPpWLVRkIKrF3lfYUDE9al5VwZNJ2xQ+9vz8KPSAnCp3GGLsf5/hIm1Smf7x89Xv3/kULZhyIdwgPqa6XmsSth16Nynv7T7KHH39/MKKwxIj7/JjFGr/+ZYxrRnsa49LoPZXOlJlHSBBEyWohUqWMC4armOuvwtwZhFO6tK1Cf9jIWE5R2aVqteKsLOs/kJ8SwTzB7WW6RUKO5YFzsSQE720Ed6j/6/XZzb1iu5g0+N0MJHPMFyHaUQs9rjtfeuZ+qEeRBs3/H2hVsg5BegDv8QnvRotgSVJXz6k1NlFuSUrSqzCF0e7X7NP35HnMLHFWsW06WFJ31liddPrgqVzUvVe1sKl0SYfKzY9vLj/a+7RmgVWBhbqWjdIapAjpvq5zRhA5V4/lNwsVSCid0+jXQMgMIliQc6lkhLNtUuO0EAnRMUAn+zvLCmNPaCdC3Kjn3EQ8QkR/APs30oWdAwAA" autocomplete="off" />
</form></body>
</html>
[ 0 ] Comments